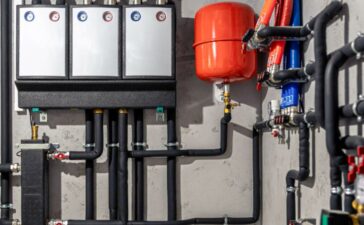
Plumbing issues, from a leaky faucet to a clogged drain, are an inevitable part of homeownership. While some problems require the expertise of a professional plumber, many common plumbing issues can be repaired with a little know-how, a few tools, and some patience. Mastering the basics of plumbing repair not only empowers you to tackle minor issues as they arise but can also save you money and prevent further damage to your home. This article will guide you through a step-by-step approach to mastering plumbing repairs, from identifying the problem to completing the fix with confidence.
Step 1: Assess the Situation
Before diving into any plumbing repair, it’s essential to fully understand the problem at hand. Carefully assess the issue and gather all the necessary information. Is the problem a leaky faucet, a clogged toilet, or low water pressure? Identifying the root cause will help you determine the appropriate course of action and whether you need additional parts or tools.
Start by turning off the water supply to your home. Most plumbing repairs, particularly those involving leaks, require you to stop the flow of water before proceeding. Look for the main shutoff valve, typically located near the water meter or where the water line enters your home, and turn it off. If you’re working on a specific fixture, such as a sink or toilet, look for the individual shutoff valve under the fixture and turn that off instead.
Step 2: Gather the Necessary Tools and Materials
Once you’ve assessed the issue, it’s time to gather the tools and materials you will need. The most common plumbing tools include:
-
Pipe Wrench or Adjustable Wrench: Useful for loosening and tightening nuts and bolts on pipes and fixtures.
-
Plunger: Ideal for clearing clogs in toilets, sinks, and tubs.
-
Plumbing Snake (Auger): For more stubborn clogs that a plunger can’t clear.
-
Pipe Cutter or Hacksaw: To cut through PVC or metal pipes if necessary.
-
Teflon Tape: Used to seal pipe threads and prevent leaks.
-
Rubber Gloves and Plumber’s Tape: For protecting your hands and securing connections.
-
Bucket or Towels: To catch any water that might spill during the repair.
Depending on the repair, you may also need replacement parts, such as washers, O-rings, faucets, or pipe segments. Always make sure to turn off the water supply before beginning your repair.
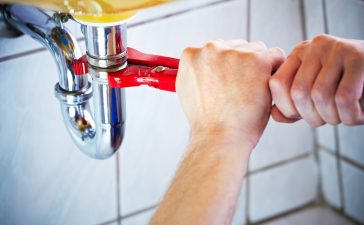
Step 3: Leaky Faucets—A Common Issue
Leaky faucets are one of the most common plumbing problems and, fortunately, one of the easiest to fix. A leaky faucet usually occurs due to worn-out washers or O-rings, which create a gap in the seal and allow water to seep out.
To repair a leaky faucet, start by turning off the water supply to the fixture. Use your wrench to remove the handle and disassemble the faucet. Once you’ve exposed the internal components, inspect the washers, O-rings, and other parts for signs of wear. If any part is damaged, take it to your local hardware store for a replacement.
After replacing the necessary components, reassemble the faucet, turn the water supply back on, and test the faucet to ensure the leak has been stopped. This simple fix can save you from wasting water and facing higher utility bills.
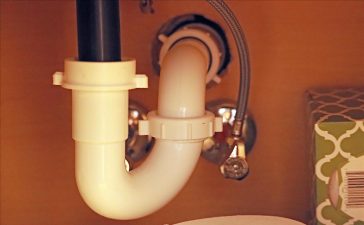
Step 4: Clogged Drains—A Routine Problem
A clogged drain is another common issue that many homeowners will encounter. Whether it’s in the kitchen sink, bathroom sink, or bathtub, a clogged drain can be frustrating, but most clogs can be cleared with a few basic tools.
Begin by using a plunger to try to dislodge the clog. Ensure you create a tight seal around the drain opening before plunging vigorously. If the clog persists, you may need to use a plumbing snake (also known as an auger). Insert the snake into the drain and twist it to break up the blockage. Pull the snake out periodically to remove any debris that has been loosened.
If the clog is still stubborn after these methods, you may want to try a mixture of baking soda and vinegar to break it down. Pour about half a cup of baking soda down the drain, followed by half a cup of vinegar. Let it sit for 15-20 minutes before flushing it with hot water. If the clog remains, you may need to disassemble the drain trap under the sink to clear the blockage manually.
Step 5: Fixing a Running Toilet
A running toilet is not only annoying but can waste a significant amount of water and increase your utility bills. The issue typically lies with the flapper, fill valve, or float mechanism inside the toilet tank.
Start by removing the toilet tank lid and inspecting the components. The flapper, which is responsible for sealing the tank after a flush, may be worn out or not sitting properly. If this is the case, replacing the flapper with a new one should stop the running water.
If the flapper is intact, check the float mechanism. The float controls the water level in the tank, and if it’s set too high, water will continuously flow into the overflow tube, causing the toilet to run. Adjust the float arm or replace the fill valve if necessary. Once you’ve made adjustments, flush the toilet to test it. If the problem persists, you may need to replace the fill valve altogether.
Step 6: Fixing Low Water Pressure
Low water pressure can be frustrating, especially when you’re trying to take a shower or wash dishes. This issue often arises from mineral build-up in the aerators or showerheads, clogged pipes, or problems with the pressure regulator.
Begin by checking the aerator on your faucet or the showerhead for any visible mineral deposits or debris. If there’s build-up, soak the aerator or showerhead in vinegar overnight to dissolve the minerals. Once cleaned, reinstall the aerator and check the water pressure.
If cleaning the aerator doesn’t solve the issue, check the pipe connections for leaks or blockages. If the pipes are clogged with sediment or rust, you may need to use a pipe cleaner or call in a professional plumber to address more complex issues.
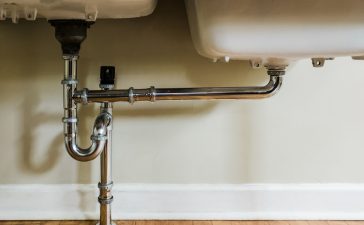
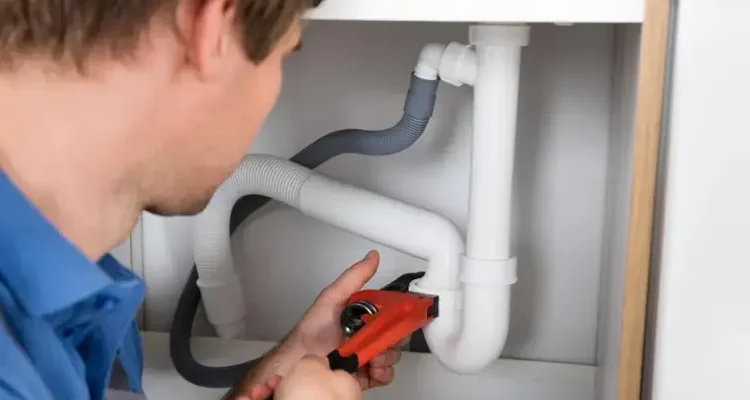
Step 7: Dealing with Pipe Leaks
Pipe leaks can cause significant water damage if not addressed promptly. Small leaks may be sealed with pipe joint compound or Teflon tape, while larger leaks require pipe replacement.
Start by locating the leak and turning off the water supply to the affected area. Use a pipe cutter or hacksaw to remove the damaged section of pipe if necessary. Then, replace the pipe with a new one of the same material and size. For threaded connections, use Teflon tape to ensure a tight seal. Once the new pipe is in place, test the repair by turning the water back on and checking for any signs of leakage.
Step 8: Know When to Call a Professional
While DIY plumbing repairs can save time and money, there are certain situations where it’s best to call a professional. If you encounter a persistent problem that you can’t resolve, or if you’re unsure about how to proceed with a repair, it’s important to consult a licensed plumber. Additionally, issues involving the main sewer line, major pipe replacements, or advanced leak detection are best handled by professionals with the right tools and expertise.
Conclusion
Mastering plumbing repairs doesn’t require years of training, but it does require a systematic approach and attention to detail. By understanding the problem, gathering the necessary tools, and following the appropriate steps, you can handle many common plumbing issues with confidence. Whether you’re fixing a leaky faucet, clearing a drain, or replacing a faulty toilet part, a little DIY know-how can go a long way in ensuring your plumbing stays in good working condition. With patience and practice, you’ll become proficient at these repairs, ultimately saving time, money, and frustration in the long run.