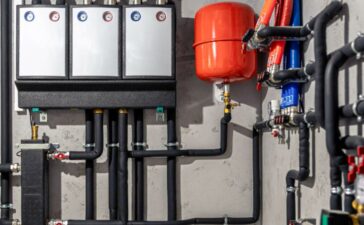
In the intricate web of your home’s plumbing system, pipes are the silent workhorses that carry water to and from your fixtures, ensuring your daily routines run smoothly. Whether it’s the kitchen sink, the shower, or the laundry room, your plumbing relies heavily on a network of pipes working harmoniously together. However, just like any other system, pipes can encounter problems over time, leading to frustrating clogs, leaks, or worse, water damage. Knowing how to properly maintain and repair pipes is an invaluable skill for any homeowner. This guide will walk you through the essential steps of mastering pipework in your plumbing system—whether you’re troubleshooting an issue, replacing old pipes, or simply maintaining the system to ensure long-term functionality.
Step 1: Understand the Different Types of Pipes
Before diving into any repair or maintenance task, it’s essential to understand the various types of pipes commonly used in residential plumbing systems. The type of pipe you’re dealing with will dictate the methods of repair, the tools needed, and even the materials you’ll use.
-
PVC (Polyvinyl Chloride) Pipes: Lightweight, durable, and resistant to corrosion, PVC pipes are commonly used for drain, waste, and vent systems. They are easy to cut and join using solvent cement, making them a popular choice for DIY repairs.
-
PEX (Cross-linked Polyethylene) Pipes: Flexible and resistant to freezing, PEX is commonly used for water supply lines in homes. It is often chosen for its ease of installation, as it can bend around corners without the need for fittings.
-
Copper Pipes: Known for their longevity and resistance to corrosion, copper pipes are often used for both cold and hot water supply lines. However, copper is more expensive and requires specialized tools for installation and repair.
-
Galvanized Steel Pipes: Once a popular choice for plumbing, galvanized steel pipes are prone to corrosion and are often replaced in older homes. They are sturdy but susceptible to rusting, which can lead to reduced water flow and potential leaks.
-
Cast Iron Pipes: Often used for larger drain lines, cast iron pipes are durable but can be heavy and difficult to handle. They are prone to rusting over time, which can lead to cracks or leaks.
Familiarity with these materials will help you identify the type of pipe you’re working with and determine the best approach to any given task.
Step 2: Assessing the Problem
The first step in mastering plumbing pipework is accurately assessing the issue. Is the problem a leaky pipe, a clogged drain, or low water pressure? Understanding the symptoms and identifying the root cause of the problem is critical to selecting the correct solution. Some common plumbing problems related to pipes include:
-
Leaks: A leaking pipe can be the result of corrosion, a poor seal, or even physical damage.
-
Clogs: Blockages often form due to debris, grease, or mineral deposits that accumulate in pipes over time.
-
Burst Pipes: Freezing temperatures, age, or excessive pressure can cause pipes to burst, leading to significant water damage.
-
Low Water Pressure: Often a result of mineral buildup, corroded pipes, or a clogged aerator, low water pressure can also indicate a larger issue within the plumbing system.
Once you’ve identified the issue, it’s essential to determine the specific area of the plumbing system that needs attention. Leaky pipes can often be traced to a joint or a crack, while clogs may require snaking or flushing the pipes. For burst pipes, immediate attention is needed to prevent flooding.
Step 3: Turn Off the Water Supply
Before making any repairs or adjustments to your plumbing pipes, always turn off the water supply to your home. The main shutoff valve is typically located near the water meter or where the water line enters the house. Turning off the water supply ensures that no additional water will flow into the pipes during your repairs, reducing the risk of flooding or water damage.
If you’re working on a specific fixture, such as a sink or toilet, you may be able to simply turn off the individual shutoff valve located beneath or behind the fixture. However, for major repairs, it’s safest to cut off the water to the entire house.
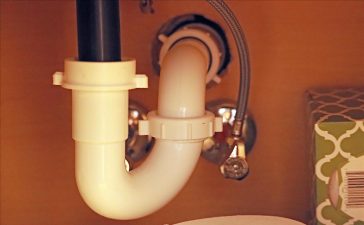
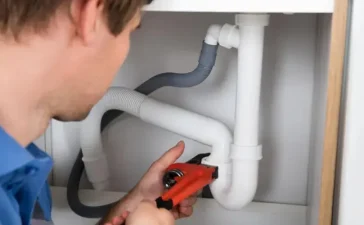
Step 4: Cutting and Replacing Damaged Pipes
If you need to replace a section of pipe, the first step is to cut out the damaged portion. For most pipes, you’ll need a pipe cutter or hacksaw. Be sure to measure and mark the section of pipe that needs replacing, and use a pipe cutter or hacksaw to make clean, straight cuts. For plastic pipes like PVC, a pipe cutter will work best; for metal pipes, such as copper or galvanized steel, a hacksaw will be necessary.
Once the damaged section is removed, it’s time to prepare the new pipe segment. For PVC pipes, use a deburring tool to smooth the edges of the cut pipe, and apply PVC primer and cement to both the inside of the fitting and the outside of the pipe. Quickly insert the pipe into the fitting and hold it in place for a few seconds to ensure a secure bond.
For copper pipes, you’ll need to use a torch to heat the pipe and solder the joint with copper solder. This method requires precision and care, as overheating the pipe can cause damage. If you’re not comfortable with soldering, it’s best to consult a professional plumber.
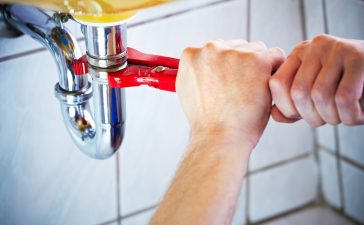
Step 5: Using Teflon Tape for Threaded Connections
For threaded pipe connections, such as those found in older plumbing systems or on certain fixtures, Teflon tape is essential for creating a watertight seal. Wrap the tape around the male threads of the pipe in a clockwise direction, ensuring it covers the threads completely. When making the connection, tighten the pipe by hand first and then use a wrench to secure it further. Teflon tape prevents leaks by filling in the gaps between the threads, ensuring a tight, leak-free connection.
Step 6: Repairing Leaks
Leaks in your pipes can often be repaired without completely replacing the damaged section. For small leaks, consider using pipe repair clamps or epoxy putty. A pipe repair clamp is a temporary fix that can seal off a small crack or hole. Simply place the clamp over the damaged area and tighten it to compress the rubber seal around the pipe.
Epoxy putty is another effective solution for small leaks. Mold the putty around the leak, following the manufacturer’s instructions, and allow it to cure before turning the water back on. While these solutions can work in the short term, they should not be considered permanent fixes. If the leak persists or if the pipe is significantly damaged, replacement is necessary.
Step 7: Dealing with Clogs
Clogs are a common issue in plumbing, especially in sinks, showers, and toilets. For minor clogs, start by using a plunger to create pressure and dislodge the blockage. For drains in sinks or bathtubs, a drain snake (also known as an auger) can be highly effective. Insert the snake into the drain, rotate it to break up the clog, and then pull it back out. You may need to repeat the process to fully clear the pipe.
If you encounter a stubborn clog that cannot be removed with these tools, you may need to use a chemical drain cleaner or hire a professional plumber. However, be cautious with chemical drain cleaners, as they can damage certain types of pipes, particularly older or plastic pipes.
Step 8: Preventing Future Pipe Issues
To ensure the longevity of your pipes and avoid future plumbing problems, consider adopting a few preventative measures:
-
Regularly clean drains and pipes to remove any debris, grease, or soap scum that may accumulate.
-
Install a water softener if you live in an area with hard water, as mineral deposits can build up in pipes over time.
-
Insulate exposed pipes to prevent freezing during the winter months, which can lead to burst pipes.
-
Avoid pouring grease, oil, or non-degradable materials down the drain, as these can lead to clogs and damage to your pipes.
Step 9: Know When to Call a Professional
While many pipe repairs and maintenance tasks can be tackled by homeowners, there are times when it’s best to call in a professional plumber. If you’re dealing with major pipe replacements, burst pipes, or persistent clogs that you can’t clear, a licensed plumber will have the tools and expertise to address the issue effectively. Additionally, some plumbing tasks—such as soldering copper pipes or working with gas lines—require specialized training and should never be attempted by an untrained individual.
Conclusion
Mastering pipework in your plumbing system requires both knowledge and practice, but with the right tools and techniques, it’s an achievable skill for any homeowner. From understanding the types of pipes in your system to replacing damaged sections and preventing future issues, a proactive approach to pipe maintenance can save you time, money, and frustration in the long run. By following the steps outlined in this guide, you can ensure that your plumbing system remains in good working order, providing you with the peace of mind that comes from knowing your home’s waterworks are functioning as they should.