When it comes to protecting your home from the elements, your roof is undoubtedly the most crucial line of defense. However, an often-overlooked aspect of roofing systems that plays a vital role in safeguarding your home is the gutter system. Gutters are designed to channel rainwater away from your roof, preventing water damage to your foundation, walls, and landscaping. Yet, despite their importance, gutters are frequently ignored during roof maintenance or installation. A proper gutter system, however, is essential to a well-functioning roof, and mastering its installation can save homeowners from costly repairs down the line.
This step-by-step guide will walk you through the process of installing gutters, from understanding their purpose to choosing the right materials, preparing for installation, and ensuring that your gutters will function optimally for years to come.
Understanding the Importance of Gutters
Before delving into the installation process, it’s essential to understand why gutters are indispensable to your roofing system. Gutters serve two primary functions: they direct rainwater off the roof and prevent damage to your home’s exterior. Without a functional gutter system, rainwater could pool on the roof, leading to water damage such as rotting wood, rusted roofing materials, and the growth of mold or mildew. Additionally, without proper drainage, water could overflow, soaking the foundation and causing cracking or shifting, which can be extremely costly to repair.
The critical roles of gutters include:
-
Protecting your roof by preventing water accumulation that could lead to leaks or decay.
-
Protecting your foundation by ensuring that water is channeled away from the base of the house, reducing the risk of flooding or erosion.
-
Preserving your landscaping by preventing water from spilling onto gardens, walkways, or driveways.
-
Preventing mold growth by reducing the amount of moisture that could seep into the walls or attic.
Now that we understand their importance, let’s dive into the process of mastering gutter installation.
Step 1: Choosing the Right Gutter System
The first step in the gutter installation process is selecting the right gutter system for your home. There are various materials and types of gutters available, each with its advantages and considerations. The most common types include:
-
K-style gutters: These are the most common style in the United States, with a flat bottom and decorative front that resembles crown molding. They are easy to install and offer a sleek appearance.
-
Half-round gutters: As the name suggests, these gutters are semicircular in shape. They are often found on older homes or in more traditional settings. While they are aesthetically pleasing, they tend to be less efficient than K-style gutters.
-
Seamless gutters: Seamless gutters are custom-made to fit your roof, which eliminates seams that can be vulnerable to leaks. These gutters require a professional installation service but offer superior durability and leak resistance.
-
Material Options: Gutters come in a range of materials, including aluminum, steel, copper, vinyl, and zinc. Aluminum is the most popular due to its balance of affordability, durability, and ease of installation. Copper gutters, while more expensive, add a distinctive aesthetic and are highly resistant to corrosion. Steel and zinc are also durable options, particularly for homes in regions with heavy rainfall or harsh conditions.
Step 2: Measuring for Accurate Gutter Installation
Proper measurement is essential to ensure that your gutter system functions correctly. Incorrectly sized gutters can lead to overflow, while poor positioning may result in water flowing to the wrong areas.
-
Measure the perimeter of your roof: Begin by measuring the length of each section of your roof where gutters will be installed. Take measurements from corner to corner, ensuring that you include all sides of the house.
-
Determine the pitch: The gutters should slope slightly (about ¼ inch for every 10 feet of gutter) toward the downspout to ensure proper drainage. Mark the highest point of the roof and ensure the gutter’s slope moves downwards toward the downspout.
-
Plan for downspouts: Downspouts are essential for channeling the water away from the house. Plan for at least one downspout for every 30 to 40 feet of gutter. Ensure that downspouts are positioned at strategic points to direct the water away from the foundation.
Step 3: Gather the Necessary Tools and Materials
Before beginning the installation, make sure you have all the tools and materials you need. The following are some of the basic items required for gutter installation:
-
Gutters (custom-sized to your measurements)
-
Downspouts
-
Gutter hangers or brackets
-
Elbows (for the downspout)
-
Gutter sealant
-
A ladder (preferably extension ladder)
-
Drill with screwdriver attachments
-
Level
-
Saw (if needed to cut gutters to size)
-
Safety gloves and goggles
-
Measuring tape
It’s important to ensure that all tools are in good working condition to avoid delays during the installation.
Step 4: Install the Gutter System
Once you’ve selected your gutters and gathered all the necessary tools, you can begin the installation process. Follow these steps carefully for a secure and functional gutter system:
1. Attach the Gutter Hangers
-
Begin by attaching gutter hangers or brackets to the fascia board (the board that runs along the edge of the roof) at regular intervals. The hangers should be spaced about 18 inches apart to ensure the gutter is properly supported.
-
Make sure the gutter hangers are securely attached and positioned at a slight slope to ensure water flows towards the downspout. This is a critical step to ensure proper water drainage.
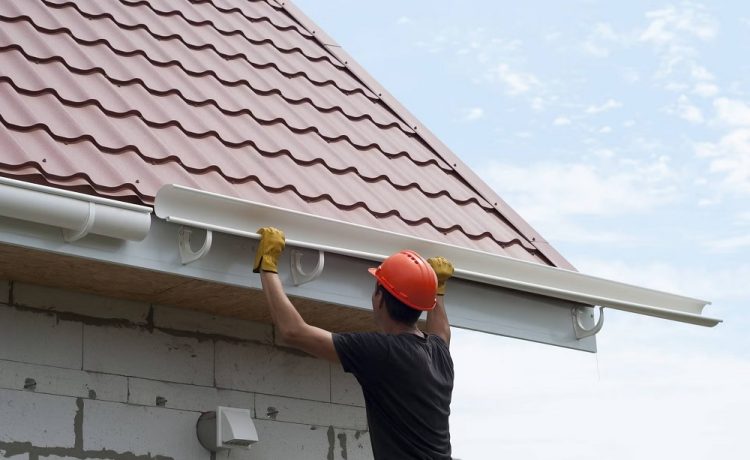
2. Mount the Gutters
-
Starting from one end of the roof, lift the gutter onto the hangers, ensuring that the slope is properly maintained. You may need a second person to help lift the gutter into place.
-
As you work along the roofline, use screws or nails to secure the gutter to the hangers. Ensure that the gutter sits tightly against the fascia to prevent any gaps where water could leak through.
3. Install the Downspouts
-
Once the gutter is in place, measure and cut the downspout to the appropriate length. Attach the downspout to the gutter outlet using elbows or connectors, ensuring a secure fit.
-
Position the downspout so that it directs water away from the foundation. You may need to extend the downspout with a splash block or drainpipe to direct water further away from your home.
4. Seal the Joints
-
For seamless protection against leaks, use high-quality gutter sealant on the joints where sections of gutter meet. Apply the sealant generously and ensure there are no gaps.
-
Double-check that all connections are secure and that the gutters are properly sloped to allow for the smooth flow of water.
Step 5: Test and Inspect
After installation, it’s time to test your new gutter system to ensure it functions as intended. Fill the gutters with water using a garden hose and observe how it flows toward the downspout. Check for any signs of leaks, sagging, or improper drainage. Make sure that the water flows smoothly and away from the foundation, as it should.
If any issues are noticed, make adjustments to the slope, downspouts, or gutter connections. The system should be able to handle rainfall efficiently and keep your home protected from water damage.
Step 6: Regular Maintenance and Upkeep
While gutter installation is an essential part of protecting your home, it’s important to maintain your gutters regularly to ensure they continue to function properly. Over time, gutters can accumulate debris like leaves, twigs, and dirt, which can obstruct water flow. Clean your gutters at least twice a year—once in the spring and once in the fall—or more frequently if you have nearby trees.
Additionally, inspect your gutters after heavy storms to ensure there are no blockages or damage. Consider installing gutter guards to reduce debris buildup and make maintenance easier.
Conclusion
Mastering gutter installation is an essential skill for homeowners who want to protect their property from water damage and ensure the longevity of their roofing system. By choosing the right materials, carefully measuring, and following the correct installation steps, you can create a gutter system that will effectively channel water away from your home and safeguard your foundation. Regular maintenance will ensure that your gutters remain in optimal condition, continuing to provide valuable protection for years to come. Whether you’re a DIY enthusiast or hiring a professional, mastering gutter installation is an investment that pays dividends in the form of a dry, safe, and durable home.